After taking the paint off to reveal a bare metal surface it was important to make sure that flash rusting did not take place. We had a really good summer and the chances of rain were minimal but we still overcoated the bare steel with a “holding primer”. This is a very thin quick drying (dry to touch in around 5 minutes) coating that prevents rusting for up to 6 months. A holding primer is ideal in situations where the preparation is done in stages over a period of time. The product we used was Jotun Muki EPS. Muki EPS is a two-pack epoxy which you can also weld direct to. Muki EPS has a pot life of 24-36 hours depending on temperature so if we mixed too much on one day we were able to save it for use the next day or even the day after.

It was something of a surprise to us that despite a thorough hull survey we still found small areas of corrosion once all the paint had been removed from the hull. What was of real concern is that the majority of the corrosion was in the same area, where the heads are located. It is logical to us now and speaking to other boat owners is known as a problem area for steel boats but that this area had not been targeted specifically for testing by the surveyor.
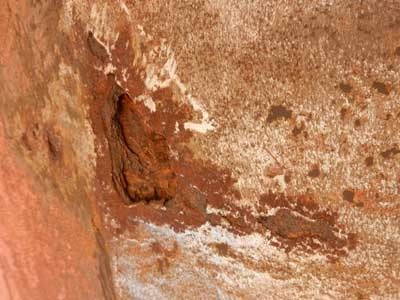
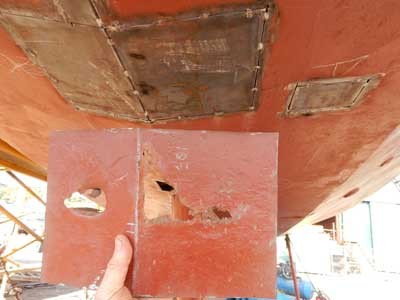
We got our own hammer and went medieval on the hull whacking it all over in a grid pattern to see if we could find any other areas. We found another area by the galley, again obvious when you think about it, but nothing else which was a relief. What this did mean is that the project took a whole other direction as now we had to start removing the interior to get to the damaged areas in the hull. We eventually removed everything in the heads (including the black water tank) and also a fresh water tank that was located forward of the heads. We concluded that the most corrosion was actually under the fresh water tank which we assumed was either due to it ‘sweating’ or leaking forming a constant pool of water in the bilge (see Part 5 for further bilge problems). Once the interior was removed we were able to cut out the corroded areas and weld in new plates.
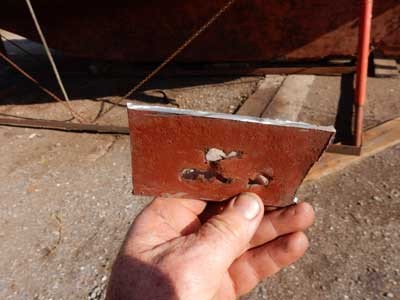
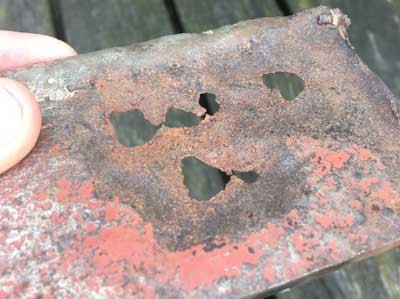
It is interesting to see in the images below just how localised the corrosion was and how little the surrounding plate had been affected. The corrosion was from the inside where water lying against the frames had been unable to drain into the bilge. The photos show corrosion so localised that within 2 – 3cm of a hole the hull was full thickness (4.4mm) with no corrosion at all.
PART 2 - The viewing, purchase and survey
PART 3 - Preparing the deck and hull
PART 4 - Finding corrosion
NEXT......